Biophilia Practitioner’s Guide
A complete walk-through of a patient visit on Nittaa — from registering your clinic and your patient, through the hand acupuncture-point assessment and the Biophilia scan, to the AI analysis, the supplement plan and the report the patient takes home. Follow the steps in order the first time; after that, use each step as a reference.
About the screenshots. Where a screenshot has been supplied it is shown in the step it belongs to as a real, redacted capture — patient and practitioner details are masked. Frames still labelled “Screenshot to be added” are screens not yet captured, and each one names the screen it should show; no stand-in image is used in their place, so nothing here pretends to be a real capture. The link under each step opens the live page in the app so you can see the current screen yourself.
Read this first
Nittaa supports your clinical work; it does not practise for you. Every preliminary result, every AI analysis and every suggested supplement is information for the practitioner to weigh against the patient in front of them. Nothing is a diagnosis until you, the practitioner, decide it is one — and nothing reaches the patient until you release it.
Step 1
Practitioner registration and approval
Create your clinic account and get your practitioner ID.
Every clinic works inside its own practitioner account. Your practitioner ID is the label on all patient records, invoices and reports you create, so register once, with your real clinic details.
What you do
- 1Open the practitioner registration page and create your account with your full name, email, mobile number and country.
- 2Enter your promoter ID — every new practitioner registration must be linked to an approved promoter.
- 3Complete the clinic details: clinic name, province and country, so your clinic can appear in the clinic directory and in the public booking flow.
- 4Read and accept the Practitioner Agreement.
- 5Sign in. Your account starts on the free trial period; activate a subscription from Billing when the trial ends.
What the system does
- Issues your unique practitioner ID.
- Sets your preferred interface language from your country, which you can change later in your profile.
- Keeps your patients, reports and invoices separated from every other clinic.
Screens in the appimages pending capture
Step 2
Your profile and dashboard
Set your preferences, clinic settings and staff.
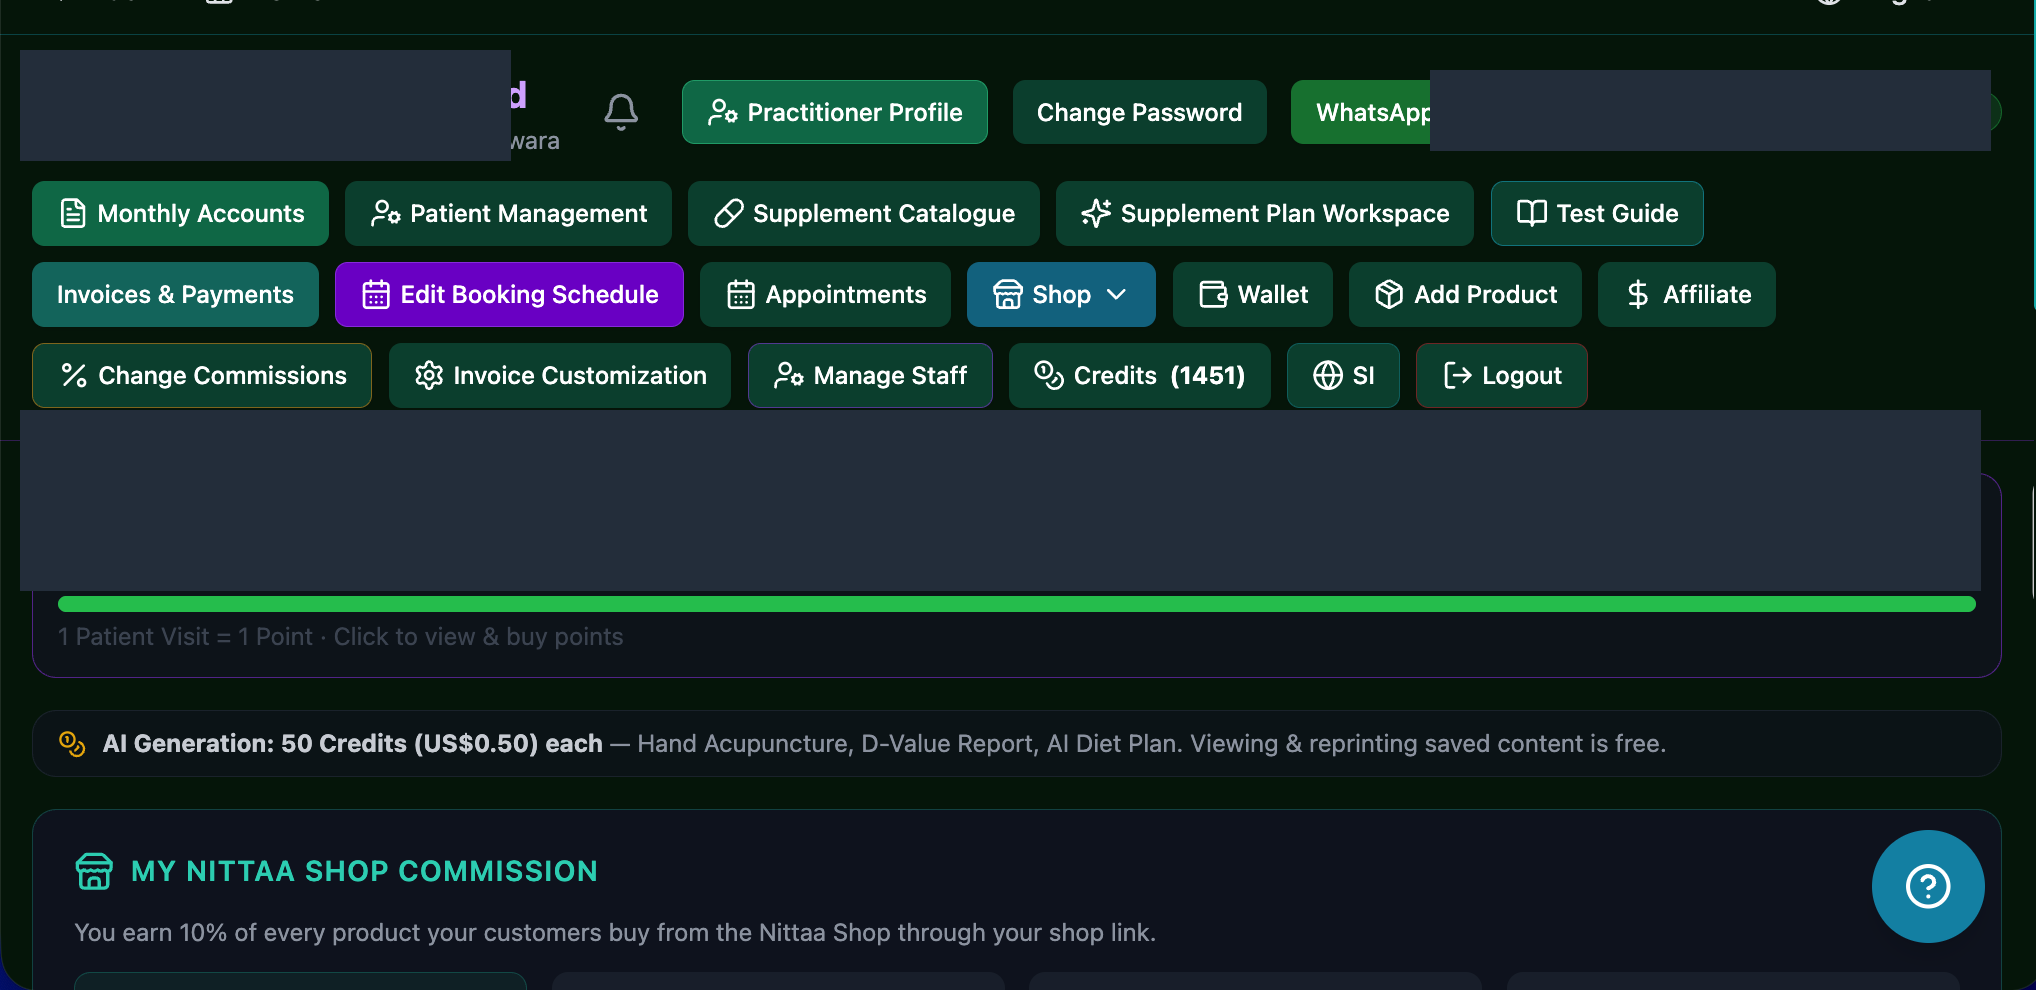
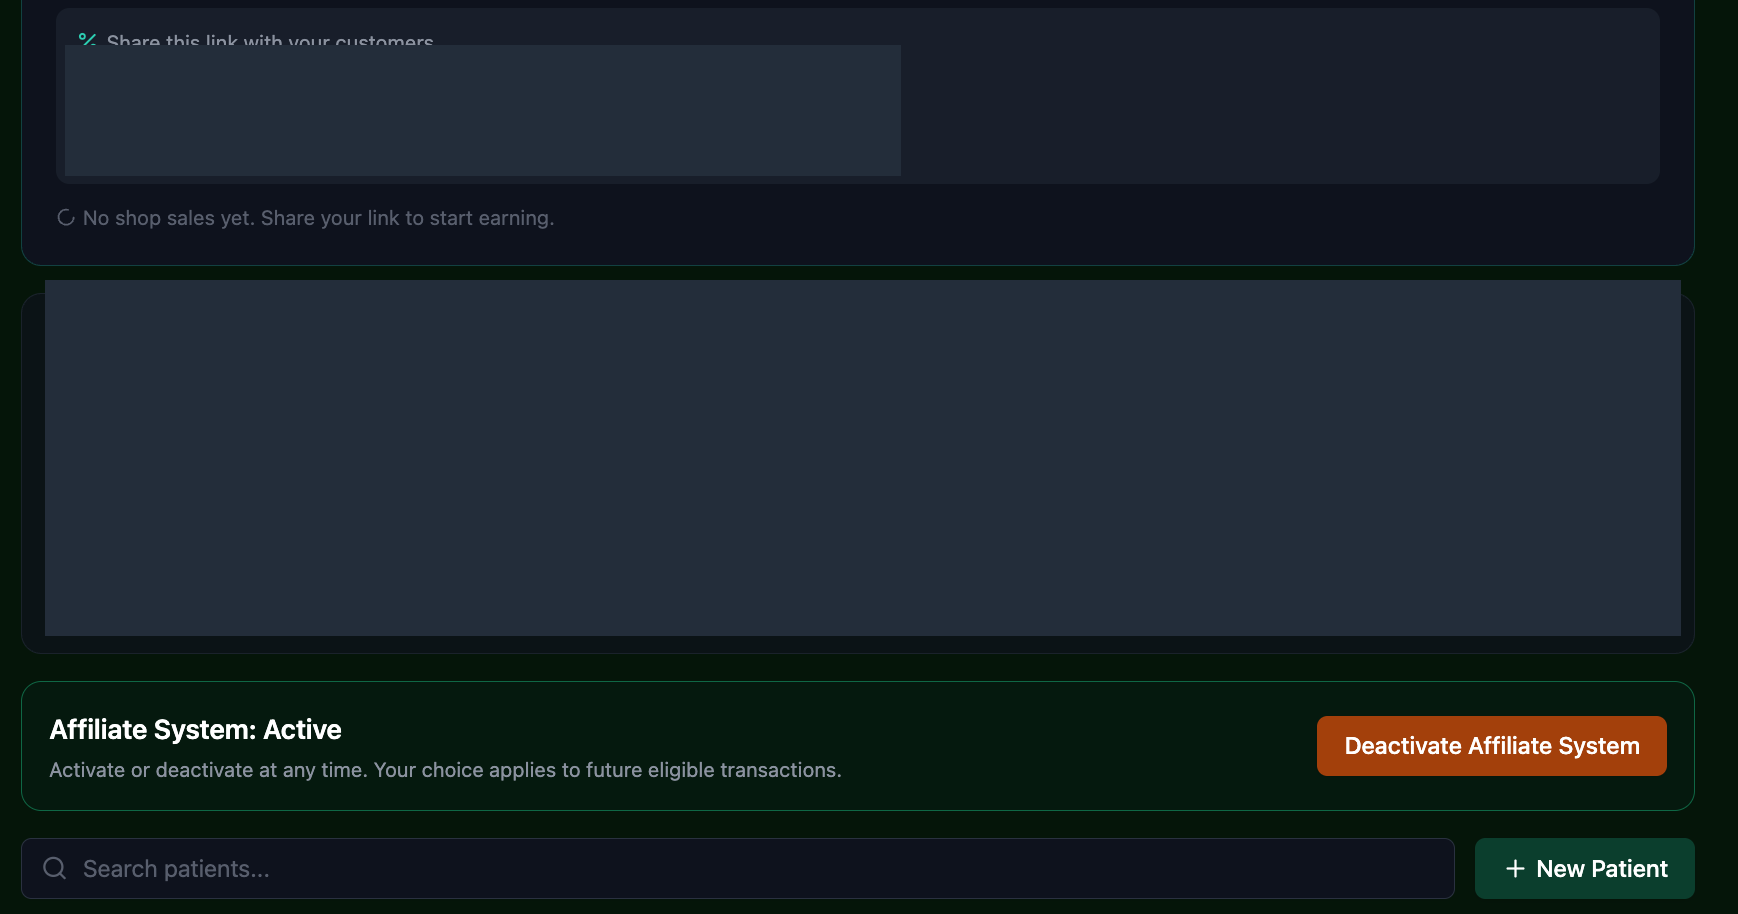
Your dashboard is the home of your clinic on Nittaa. Spend a few minutes on the profile once, and everything else — language, messaging, invoices, appointments, staff access — follows your settings.
What you do
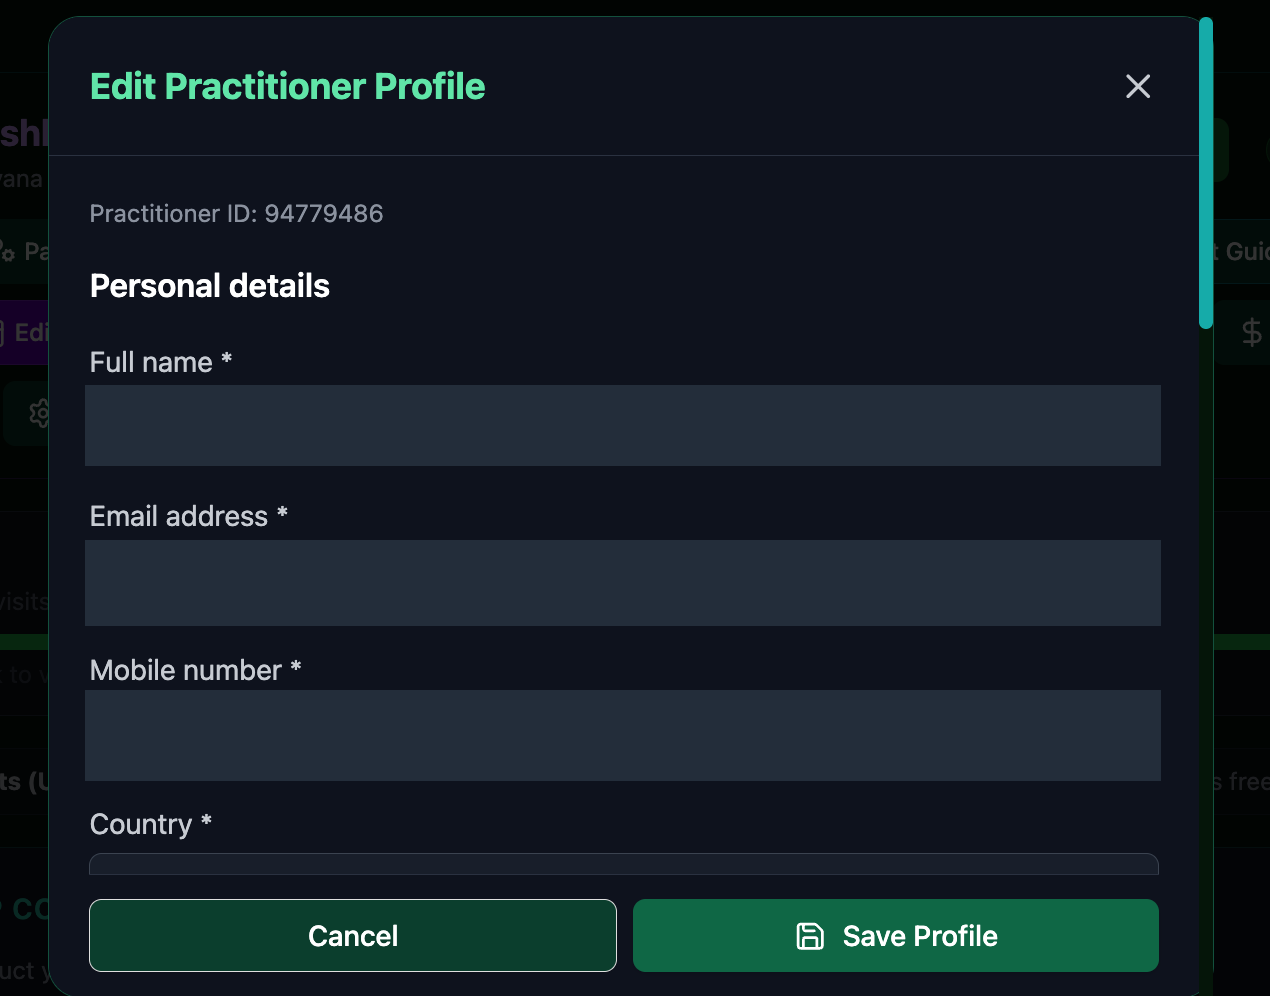
- 1Open your profile and confirm your name, contact numbers, country, province and messaging platform (WhatsApp, Telegram, Viber, LINE, SMS and others are supported).
- 2Choose your preferred interface language.
- 3Set your invoice details — clinic name, address, registration or tax reference — so every invoice prints correctly.
- 4Set the number of scanning stations if your clinic runs more than one Biophilia device, so appointment slots match your real capacity.
- 5Add staff accounts and give each one only the permissions that person needs.
What the system does
- Shows your trial or subscription status, credit balance, patient count and recent activity.
- Names every messaging button after the messaging platform you selected.
- Restricts staff to the permissions you granted, and keeps your own settings editable only by you.
Screens in the appcaptured from the app
Step 3
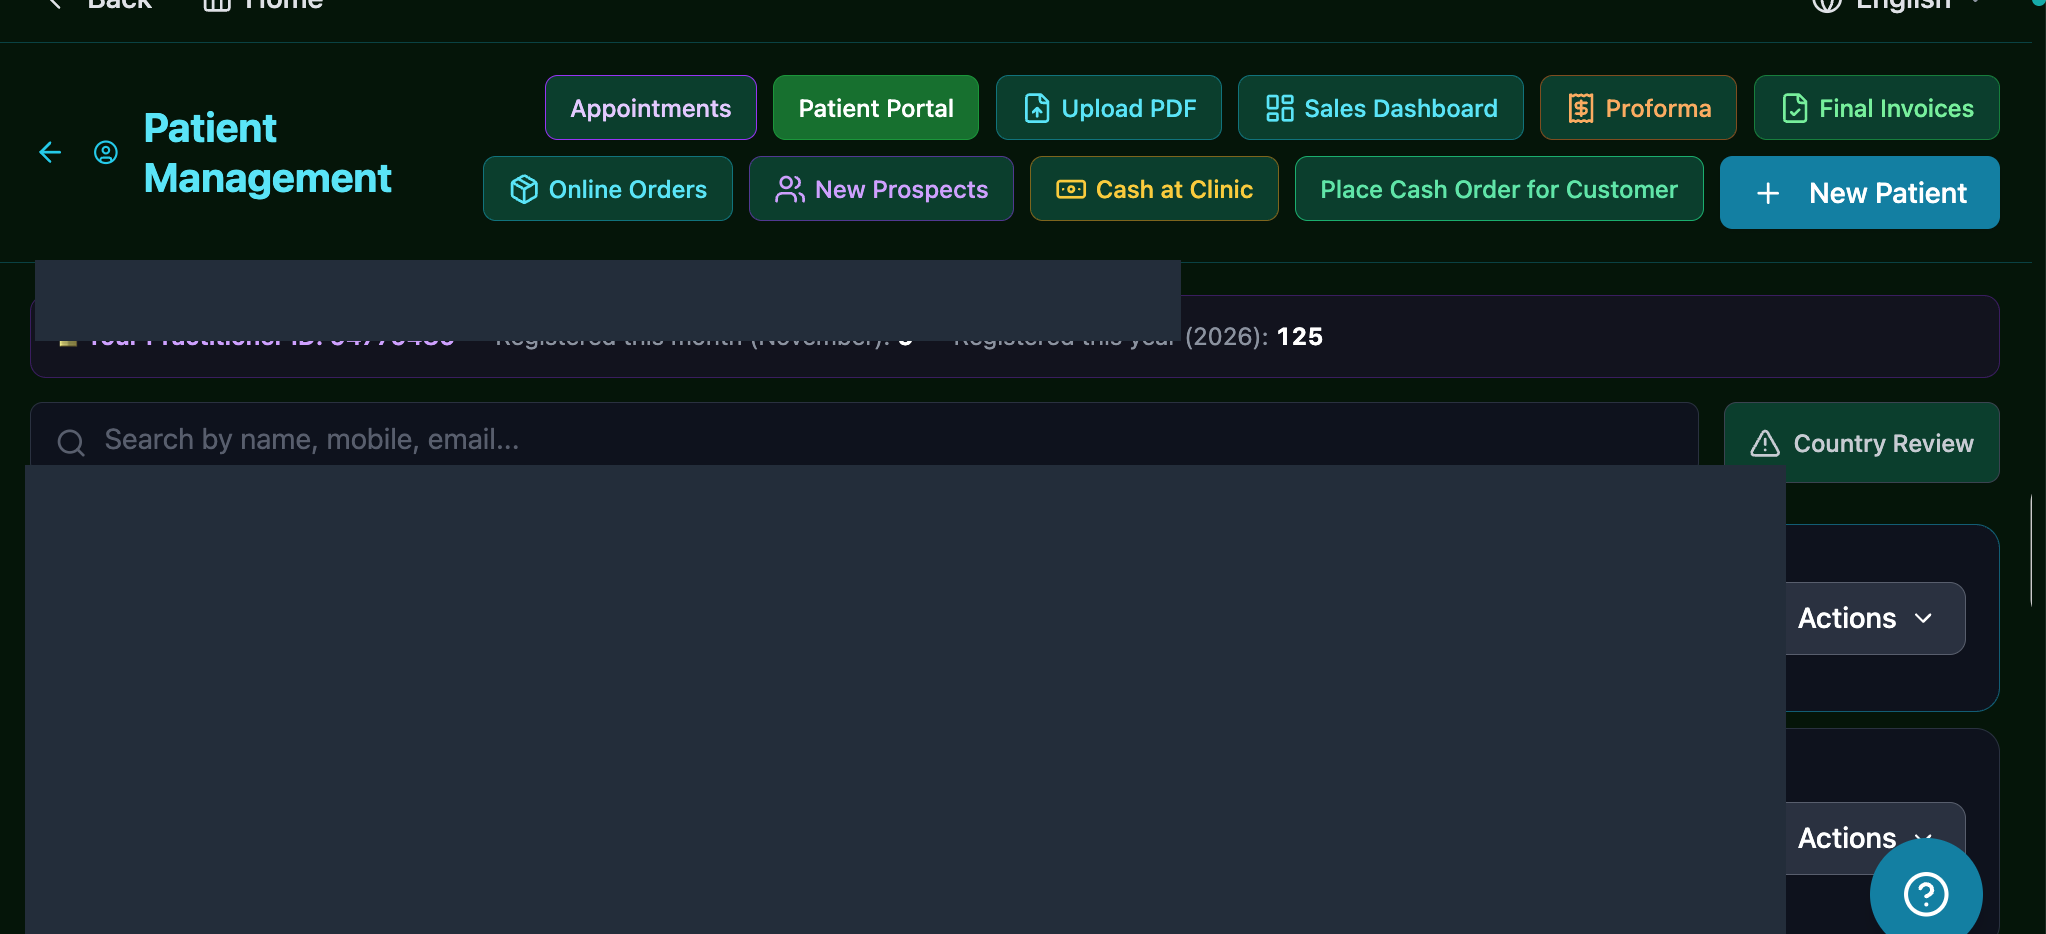
Registering a patient
Create the patient record before any test is run.
The patient record is the single folder that every later step writes into — the hand image, the scan, the D-Value report, the AI analysis, the diet plan and the final report all attach to it.
What you do
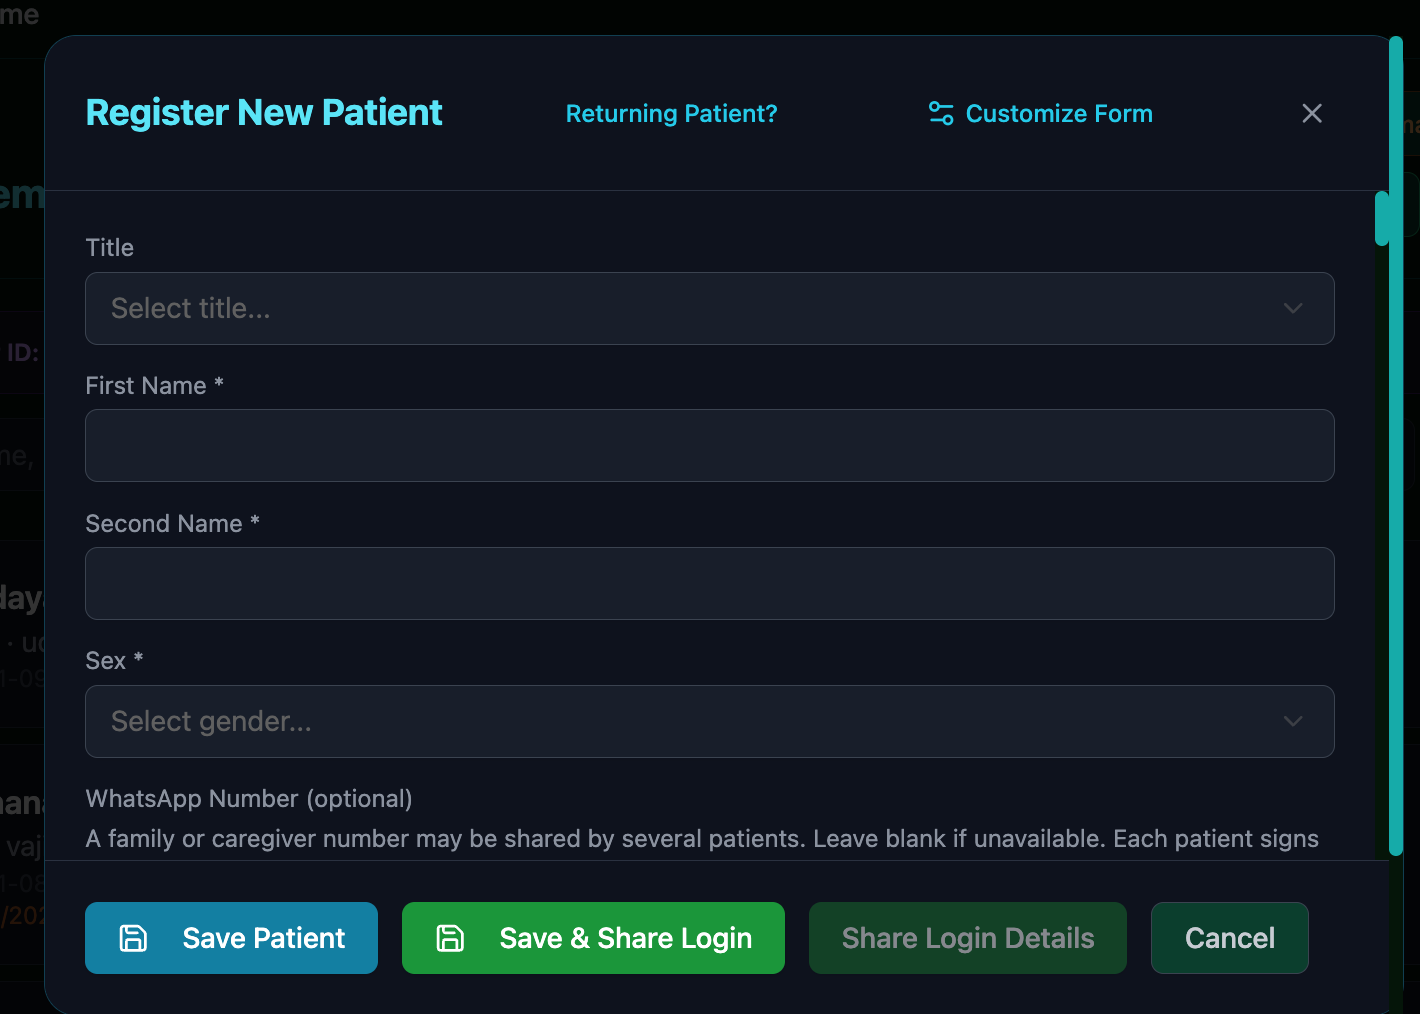
- 1Open Patient Management and choose New Patient.
- 2Record the required details: name, mobile number, WhatsApp number, email and country or shipping address.
- 3Record the presenting symptoms and complaints, and any known allergies or food intolerances.
- 4Add your clinic’s own extra registration questions from the form builder if you need them — the built-in questions always stay in place.
- 5Give the patient their portal login details so they can see the released report themselves.
What the system does
- Creates the patient record under your practitioner ID and keeps it private to your clinic.
- Keeps the primary registration fields as the fixed core; your extra questions are stored separately so the built-in form is never altered.
- Carries any allergy or intolerance you record into the diet plan logic, so those foods are excluded from generated plans.
A record can only be seen by your clinic and by administrators. Never enter a patient under another practitioner’s account, even a colleague’s, because the record then belongs to that clinic.
Screens in the appcaptured from the app
Step 4
Hand acupuncture-point image assessment
A preliminary review of the hand, before the Biophilia scan.
Before running a full Biophilia scan, review the acupuncture (Voll) points of the hand. The hand image gives a first, partial picture of which organs and systems deserve attention, so the practitioner can decide whether a full scan should follow.
What you do
- 1Choose the correct hand for the patient’s sex. Female patient → the LEFT hand image. Male patient → the RIGHT hand image. Do not swap them; the line-to-organ mapping depends on it.
- 2Run the standard hand reading in the Biophilia software and take a screenshot of the acupuncture points chart for that hand, with the meridian lines and their symbols visible.
- 3Open the patient’s record and choose Reports → Hand Image, then upload that screenshot. The reading is attached to the patient record instead of staying on your phone.
- 4Read the preliminary result and review it against the patient’s symptoms, history and your own clinical judgement.
- 5Record your decision: continue to a full Biophilia scan on the flagged organs, repeat the hand image, or stop here for today. Save the reading so it stays with the patient record.
What the system does
- Checks the uploaded image against the patient’s recorded sex — left hand for a female patient, right hand for a male patient — and says so plainly when the wrong hand has been uploaded, instead of reading it as though it were correct.
- Reads the meridian lines of the hand and the symbol on each line (up arrow, pink down arrow, small or large black square) and levels each one from optimal down to very weak.
- Names the weakest meridians and the top three organ groups behind them, in order of severity.
- Closes with next steps: which organs or systems may be worth scanning further in the Bio-Resonance machine — worded as a recommendation to investigate, never as a diagnosis.
- Keeps the saved reading with the patient record so the next visit can be compared against it.
- Uses practitioner credits for the reading, and no credits are charged if the analysis fails.
The hand assessment is advisory only. It never replaces the practitioner’s judgement, and a preliminary finding must never be presented to the patient as a diagnosis. If the patient’s sex is not recorded correctly the reading is meaningless — check it before uploading.
Screens in the appimages pending capture
Step 5
Running the Biophilia scan
Perform the test on the device and keep the output.
The Biophilia scan produces the readings the analysis is built on. Prepare the patient properly and keep the exported output with the patient record so the visit can be reviewed later.
What you do
- 1Prepare the patient: explain the test, remove metal items where your protocol requires it, and allow the patient to sit calmly before starting.
- 2Enter the patient in the Biophilia software and run the full scan.
- 3Export the E-Level / Optimum Dispersion output and the D-Value report from the device software.
- 4Upload the outputs to the patient record against this visit.
What the system does
- Stores each upload as its own report version, so a later visit never overwrites an earlier one.
- Keeps the previous visit’s reports in the patient history for comparison.
Screens in the appimages pending capture
Step 6
Uploading the D-Value report
The main report the analysis reads.
The D-Value report is the core input. Upload the final D-Value PDF (or paste the extracted text) and the system extracts every organ and marker with its value.
What you do
- 1Upload the final D-Value PDF to the patient record, or paste the D-Value text where the report arrives as text.
- 2Check the extraction review screen: match each row to the right organ or marker, and correct anything the extraction read wrongly.
- 3Confirm the upload to run the analysis.
What the system does
- Extracts organ names, disease or frequency names and D-Values from the uploaded file.
- Detects a duplicate upload of the same report by its content, so the same report is not analysed twice.
- Sorts the table by D-Value and keeps records with no valid value at the bottom, never treating a missing value as zero.
Never enter a value that is not in the report to “complete” the table. Empty means not recorded, and the analysis treats it that way.
Screens in the appimages pending capture
Step 7
Reviewing the AI analysis
Check the generated report before anyone else sees it.
The system produces the clinical analysis once and locks it, so the numbers behind a report never change after the fact. Your job is to read it, add your own clinical notes, and decide what the patient will eventually see.
What you do
- 1Read the organ-by-organ findings, the overall condition summary, the priority areas and any critical warnings.
- 2Add your own notes and recommendations alongside the locked analysis — your wording is shown in addition to it, never in place of it.
- 3Review the suggested supplement list and the generated diet plan.
- 4Regenerate the report only when something has genuinely changed, for example a corrected extraction — regeneration creates a new version and keeps the old one.
What the system does
- Shows critical or high-risk findings in a clearly marked warning block.
- Locks the calculated values, priority and risk classification with the report so a later rule update cannot silently change an old report.
- Keeps a record of every stage the report passes through, from draft to release.
AI output is decision support, not a diagnosis. Read every critical warning yourself before the patient sees anything.
Screens in the appimages pending capture
Step 8
Your shop and supplement recommendations
Match findings to products you actually stock.
Recommendations should point at products the patient can really buy. Choose which shop your recommendations come from — the Main Nittaa Shop or your own clinic shop — and approve each item yourself.
What you do
- 1Choose your shop source in My Shop: the Main Nittaa Shop, or your own shop page if you have opened one.
- 2Open the supplement review for the report and read the suggested items with the reading each one is based on.
- 3Keep, edit or remove each suggestion; add any item by hand if it belongs on the plan but was not suggested.
- 4Write your own instructions for each item — timing, duration, notes — and acknowledge the safety points and the patient’s allergies before approving.
- 5Approve the plan. Only approved items appear in the patient’s report.
What the system does
- Matches products to the weakened organs and markers in the report against the selected shop only.
- Shows the label information it used, and flags any product where usage directions, warnings or allergens are missing instead of assuming it is safe.
- Keeps an audit trail of every suggestion added, removed, edited or approved.
Nothing is prescribed automatically. The app never generates a dose; the directions you write are the directions the patient receives.
Screens in the app1 captured, 2 pending
Step 9
The final patient report
Approve and release the report to the patient.
The final report is what the patient takes home. It combines the locked analysis, your notes, the approved supplements and the diet plan.
What you do
- 1Open the report for review and read it as the patient will read it.
- 2Add or adjust your closing notes.
- 3Mark the report reviewed and approve it, then release it to the patient.
- 4Download or print a copy if the patient wants paper.
What the system does
- Only a released report appears in the patient portal.
- Records who approved the report and when.
- Keeps the report unchanged after release — a later change creates a new version instead of rewriting history.
Screens in the appimages pending capture
Step 10
The patient portal
What your patient sees after the visit.
Patients get their own login. They see the reports you released, their diet plan, their supplement plan and their appointments — and nothing you have not released.
What you do
- 1Give the patient their portal login details at the end of the visit.
- 2Show them where their report, diet plan and supplement plan appear.
- 3Explain that reports appear only after you release them.
What the system does
- Shows the patient only their own records.
- Keeps drafts and unreleased analyses hidden until you release them.
Screens in the appimages pending capture
Step 11
Appointments
Publish your availability and take bookings.
Give patients a booking link that only offers times you actually have. Slots follow your schedule template, your holidays and the number of scanning stations you run.
What you do
- 1Create your weekly schedule template with the times you see patients.
- 2Set your clinic time zone and the number of scanning stations.
- 3Add holidays or one-off blocked days so patients cannot book them.
- 4Share your booking link; add clinic-side bookings yourself for patients who phone in.
What the system does
- Offers one booking per available station in each slot, so three stations allow three patients at the same time.
- Hides times that are already taken, blocked or on holiday.
- Records each booking against the patient record so the visit can be followed through to the report.
Screens in the appimages pending capture
Step 12
Billing
Invoices, cash at clinic and your earnings.
Billing covers your own subscription, the invoices you raise for patients, and the record of what you have earned.
What you do
- 1Keep your subscription active from the billing section of your dashboard.
- 2Raise a proforma invoice for a quotation, then convert it to a final invoice when the patient agrees.
- 3Use Pay at clinic for patients who pay in person; record the cash collection so the invoice is marked paid.
- 4Check your wallet for recorded income and outstanding balance, and request a payout when you want it settled.
What the system does
- Keeps invoice and receipt numbers sequential and never reuses a number, including for voided documents.
- Shows amounts in US dollars alongside the local currency using the current daily rate.
- Credits your income ledger only after a payment is verified, and reverses it with a separate entry if the invoice is later refunded.
A payout does not change the invoice record — it only settles what the ledger already shows as earned. Always confirm the wallet balance matches your own accounts before requesting a payout.
Screens in the appimages pending capture
Step 13
Affiliate facility
Refer patients, practitioners and members.
If you take part in the affiliate programme, your referral link credits you when the people you introduce join or buy. The programme rules, rates and withdrawal conditions are shown inside the affiliate area.
What you do
- 1Open the affiliate area and read the current rules and rates before you share anything.
- 2Copy your referral link or code and share it with the people you introduce.
- 3Follow your referrals, commissions and available balance in your dashboard.
- 4Request a withdrawal from your available balance when you meet the withdrawal conditions.
What the system does
- Attributes a registration or purchase to your referral link when the person arrives through it.
- Holds commission until it becomes available under the programme rules, and shows the balance you can actually withdraw.
- Keeps a record of every referral, commission and withdrawal for you to check.
Screens in the appimages pending capture
Step 14
Help and contact
Where to get help when something is not clear.
If a step in this guide does not match what you see, get in touch before you work around it — most problems are a setting that can be corrected.
What you do
- 1Describe the screen you were on and what you expected to happen.
- 2Include the patient ID or invoice number where the question is about a specific record — never send the patient’s medical report itself.
- 3Use the WhatsApp contact on the site for the fastest reply, or the Contact Us page for anything that needs a written record.
What the system does
- Keeps a log of application errors the support team can review when you report a problem.
- Lets you switch the interface language from the language selector at the top of every page.
Screens in the appimages pending capture
The principles behind every step
- The practitioner makes the clinical decision. The system prepares information; it does not diagnose.
- Nothing reaches a patient until the practitioner releases it.
- One patient record, one clinic: records never move between practitioner accounts by accident.
- Reports, invoices and analyses are never silently rewritten — a change creates a new version.
- Missing data is treated as missing, never as a zero or a normal result.
Need help with a step?
If a screen does not match this guide, contact the Nittaa team and quote the step number and the patient ID or invoice number involved. Never send a patient’s report or personal details in a general message.
Contact the Nittaa teamEducational use only. This guide explains how to use the Nittaa application; it does not provide medical advice and does not replace the practitioner’s clinical judgement or local regulations.